

How to Organize Siding: A Complete Guide to Planning Your Home’s Exterior
Replacing or installing siding is one of the biggest changes you can make to the exterior of your home. New siding can dramatically improve curb appeal, protect your home from the elements, and make an older house look completely refreshed.
But before the first piece of siding is installed, there is an important question homeowners often overlook: how to organize siding and the entire project so everything comes together properly.
Organizing a siding project is about much more than stacking materials or choosing a color. You need to think about the type of siding, colors, trim, accessories, measurements, materials, installation sequence, budget, and how everything will work together with your roof, windows, doors, and other exterior features.
Whether you’re planning a small siding repair or a complete siding replacement, this guide will walk you through the process.
Why Is It Important to Organize a Siding Project?
Siding covers a large portion of your home’s exterior, so even a small planning mistake can have a noticeable impact.
Poor planning can lead to:
- Ordering too much or too little material
- Color combinations that don’t work well together
- Delays during installation
- Mismatched siding or trim
- Unexpected costs
- Poor coordination with windows, doors, roofing, or decks
- A finished exterior that doesn’t look the way you envisioned
Learning how to organize siding before the project begins helps eliminate many of these problems.
The goal isn’t simply to install new siding. The goal is to create an exterior where every component looks intentional.
Step 1: Start With the Big Picture
Before choosing individual siding products, step back and look at your home as a whole.
Consider the architectural style, roof color, existing windows, doors, stonework, brick, landscaping, and other permanent features.
Ask yourself:
What do I want my house to look like when the project is finished?
Do you want a traditional New England appearance? A clean, modern exterior? A classic farmhouse look? Or are you simply trying to make an older home feel newer without completely changing its character?
Starting with the overall appearance makes the individual decisions much easier.
Your siding should complement the rest of your exterior rather than compete with it.
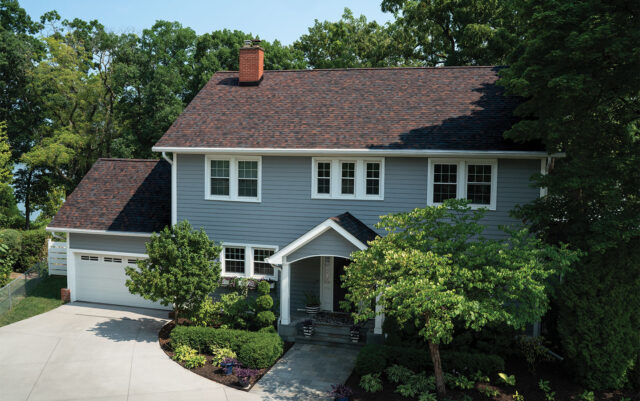
Step 2: Choose the Type of Siding
One of the most important parts of organizing your siding project is deciding what material makes sense for your home.
Common siding options include:
Vinyl siding
Vinyl siding remains a popular choice because it is relatively low maintenance, durable, and available in a wide variety of colors and profiles.
It can be an excellent option for homeowners looking for an attractive exterior without the ongoing maintenance associated with painted wood.
Composite siding
Composite siding can provide the appearance of traditional siding while offering excellent durability and resistance to common exterior problems.
Depending on the product, composite siding can also provide a distinctive, higher-end appearance.
Fiber cement siding
Fiber cement is another popular option for homeowners looking for a durable exterior material with a more substantial appearance.
It can closely resemble painted wood and is available in different profiles and finishes.
The best siding material depends on your home’s construction, your budget, your maintenance expectations, and the appearance you’re trying to achieve.
Step 3: Organize Your Siding Colors
Once you’ve selected the type of siding, it’s time to organize your color scheme.
This is where many homeowners become overwhelmed.
Instead of looking at dozens of individual colors, divide the exterior into three basic categories:
1. Main color:
The primary siding color covering most of the house.
2. Secondary color:
An optional accent used on architectural features, gables, dormers, or specific sections of the home.
3. Trim color:
The color used around windows, doors, corners, fascia, and other trim details.
You don’t necessarily need three different colors. In fact, many beautiful homes use one siding color and one complementary trim color.
The important thing is to create a cohesive combination.
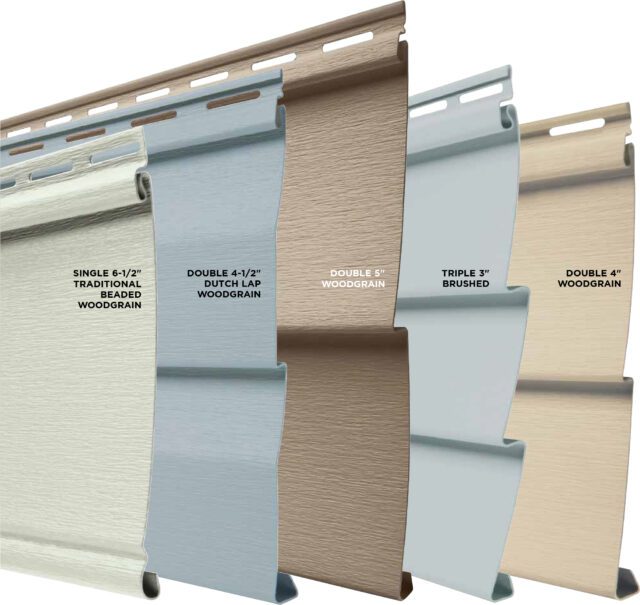
Step 4: Consider Siding Profiles and Textures
Siding isn’t just about color.
The profile and orientation can have a major impact on the appearance of your home.
Horizontal lap siding creates a familiar traditional appearance. Vertical siding can make certain sections of a house feel taller. Shake-style siding can add texture and visual interest to gables and accent areas.
Some homes benefit from combining multiple siding profiles.
For example, a house might use traditional horizontal siding across the majority of the exterior while incorporating shakes or vertical siding in specific architectural areas.
This is one of the best ways to add character without making the exterior look overly complicated.
Step 5: Organize Your Trim and Accessories
A siding project involves much more than the siding itself.
You also need to account for the materials surrounding it.
Depending on your home, these may include:
- Outside corners
- Inside corners
- Window trim
- Door trim
- Fascia
- Soffits
- J-channel
- Starter strips
- Utility trim
- Vents
- Shutters
- Mounting blocks
- House wrap or weather-resistant barrier
Organizing these components before installation helps ensure that the finished exterior looks clean and intentional.
Trim is particularly important because it creates the visual boundaries between different parts of your home.

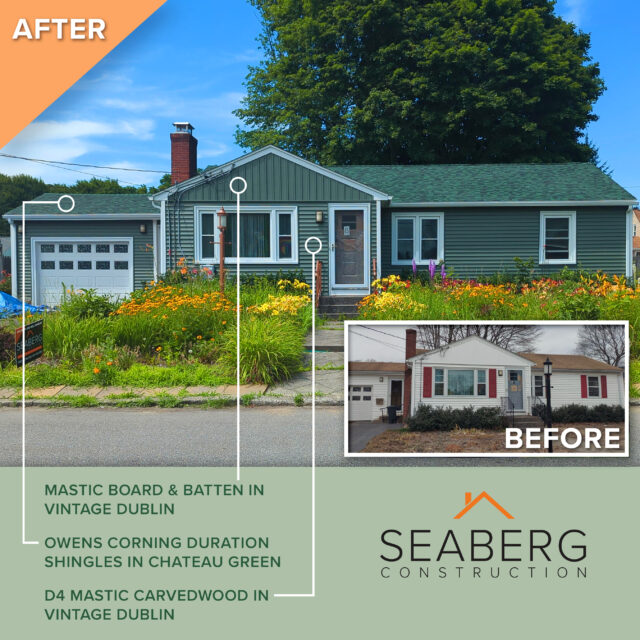
Step 6: Coordinate Siding With Your Roof
Your siding and roof make up two of the largest visual surfaces on your home.
They need to work together.
If you have a dark roof, you may want to consider a lighter or complementary siding color. A lighter roof may give you more flexibility with darker siding colors.
You don’t have to match your siding to your roof exactly.
In fact, contrast can make an exterior much more interesting.
The key is to make sure the colors share an overall visual relationship.
If you’re also replacing your roof, organize both projects together whenever possible. Coordinating the two can make it easier to create a cohesive exterior rather than choosing materials independently.
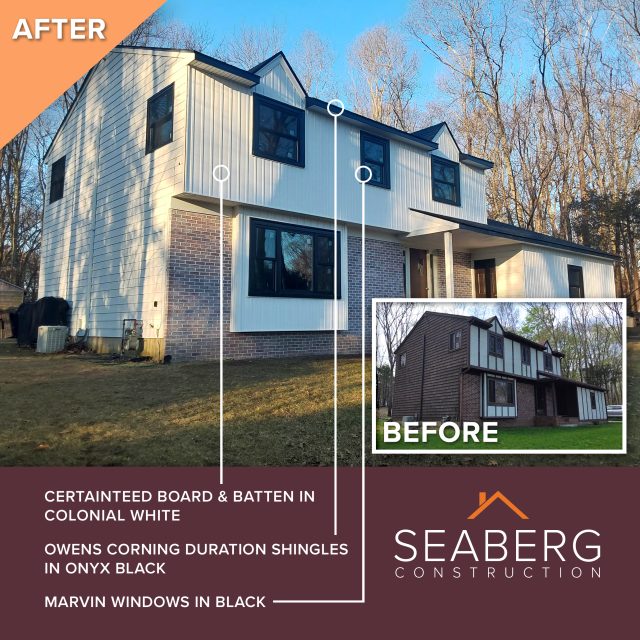
Step 7: Coordinate Siding With Windows and Doors
Windows and doors are another important part of the exterior design.
If you’re replacing windows or exterior doors at the same time as your siding, plan the projects together.
This can affect:
- Trim dimensions
- Flashing
- Siding installation
- Exterior colors
- Window and door styles
- The overall appearance of the home
A siding replacement can also be a great opportunity to update outdated trim around existing windows and doors.
The goal should be for the siding, windows, and doors to look like they belong together.
Step 8: Measure and Plan Materials Carefully
Once the design is established, the practical side of organizing siding begins.
Accurate measurements are critical.
Your contractor will need to account for wall dimensions, windows, doors, gables, corners, and other areas that affect material quantities.
Siding is typically ordered with additional material to account for cuts and waste. However, that doesn’t mean you should simply order as much as possible.
Too little material can cause delays.
Too much can unnecessarily increase your cost.
Professional measurements and a detailed material estimate can help keep the project organized from the beginning.
Step 9: Organize the Installation Process
A good siding installation follows a logical sequence.
Before siding goes onto the house, the contractor may need to address existing siding removal, sheathing, flashing, moisture protection, house wrap, and other underlying components.
The installation may then progress through starter strips, corners, trim, siding panels, accessories, and finishing details.
A professional contractor should explain what will happen before work begins.
You should know:
- When materials will arrive
- When preparation begins
- How long installation is expected to take
- Where materials will be stored
- What areas of the property need to remain accessible
- How cleanup will be handled
- Who your point of contact will be
Clear expectations are an important part of organizing any exterior remodeling project.
Step 10: Keep Your Siding Project Organized After Installation
Your organization shouldn’t stop once the crew leaves.
Keep documentation for your siding project in one place.
That may include:
- Product information
- Color names
- Manufacturer information
- Warranty documentation
- Installation information
- Contractor contact information
- Extra siding pieces
- Maintenance instructions
If your home ever needs a repair, having the original siding information can make replacing damaged material much easier.
Store leftover siding somewhere dry and protected.
It’s especially helpful to keep several pieces of each siding profile and color if possible.
A Simple Siding Organization Checklist
If you’re trying to figure out how to organize siding, use this checklist before your project begins:
Design
- Choose the overall style
- Select the primary siding color
- Choose accent colors if needed
- Choose siding profiles
- Select trim colors
- Consider architectural accents
Materials
- Select siding material
- Calculate material quantities
- Plan for waste
- Choose trim and accessories
- Coordinate weather-resistant materials
Exterior coordination
- Consider the roof color
- Coordinate windows
- Coordinate exterior doors
- Consider the deck
- Consider stone, brick, and other permanent features
Installation
- Schedule siding removal if necessary
- Inspect the underlying structure
- Plan flashing and moisture protection
- Schedule material delivery
- Establish an installation timeline
- Confirm cleanup expectations
After installation
- Save warranty information
- Record siding colors and product names
- Store extra material
- Keep contractor information
- Follow manufacturer maintenance recommendations
Should You Organize Siding Yourself or Hire a Professional?
Some homeowners enjoy managing every detail of an exterior renovation. Others would rather have an experienced contractor guide them through the process.
There is nothing wrong with either approach.
The important thing is understanding that siding installation is more complicated than selecting a color and attaching panels to the side of a house.
A professional siding contractor can help coordinate measurements, materials, trim, moisture protection, windows, doors, roofing, and installation details.
That guidance can be especially valuable when you’re combining several exterior renovations into one project.
The Bottom Line
Knowing how to organize siding means looking at the entire exterior rather than treating siding as an isolated product.
Start with the overall appearance of your home. Choose the siding material, then work through colors, profiles, trim, accessories, measurements, and installation. At the same time, consider how the siding will interact with your roof, windows, doors, deck, and other exterior features.
The best siding projects don’t happen by accident.
They happen when the details are considered before the work begins.
And when the planning is done correctly, the result isn’t simply a house with new siding. It’s a home exterior that feels cohesive, intentional, finished, and completely yours.
Ready to Plan Your Siding Project?
If you’re considering new siding for your home, a professional exterior remodeling contractor can help you evaluate your options, compare materials, coordinate colors, and develop a plan for the entire project.
From vinyl and composite siding to fiber cement and architectural accents, the right plan can transform the appearance of your home while providing long-term protection from the elements.
Take the time to organize the project before the first piece of siding goes up. You’ll have a clearer vision, fewer surprises, and a much better chance of loving the finished result.
To obtain your complimentary estimate from Seaberg Construction, please complete the form available on our website: https://seabergconstruction.com/about-us-roofing-company/contact-us/
Read Seaberg Construction’s Google reviews left by homeowners like yourself: https://tinyurl.com/kkxwhx8k
Follow us on Facebook: www.facebook.com/seabergconstruction and Instagram: www.instagram.com/seabergconstruction to stay up-to-date with our current projects and news.
And, don’t forget to read our other blog posts for more home improvement tips and ideas: http://seabergconstruction.com/home-owners-information-center/